Hey there!
So you’ve decided you want to build Gunpla, but you have no idea where to start. Well that’s what this guide is for! Give everything a thorough read, it’s quite a bit of information but it’ll be your foundation for all future plamo exploits. However, keep in mind that this is a guide, not a full on tutorial or instruction manual. Keep in mind that plamo will require some on the fly thinking at times, and it’s impossible to describe every single scenario in this document.
Table of Contents
Nuked until further notice.
But First
For those of you with questions to be answered but not enough time to read, have a quick FAQ:
Q. What does GunPla/PlaMo mean?
A. They're portmanteaus. Gundam Plastic Model and Plastic Model respectively.
Q. Wait, I thought PlaMo was Japanese for plastic.
A. プラモ (literally puramo) is a loanword from english. If you’re unfamiliar with the Japanese language, know that anything written in katakana is from a different language; it’s the alphabet used to represent foreign ideas or words.
Q. Should I start with HG or MG?
A. HG. MG isn't ridiculously hard or anything, it's just that HG is cheaper.
Q. How hard is it to move from HG to MG?
A. Zero difficulty. The only difference between the two grades are that MGs have more parts, mostly to make them more color accurate, give them an inner frame and to lower the amount of seam lines.
Q. What model should I start with? I'm totally new to Gundam.
A. HGUC RX-78-2 Revive. There are other good first kits below in Getting Started.
Q. What model should I start with? I'm familiar with Gundam.
A. Pick your favorite design from the most recent show. There’s probably a decent model kit of it… unless it was from Reconguista in G.
Q. I found a model I like for $$$. Is that a good price?
A. Most HGs should be around $20 before shipping, but MGs are all over the place. Try searching for the model on Amazon to get a baseline price.
Q. Should I get the limited edition Extra Finish kits?
A. Unless you're fine with really obvious nubs, no.
Q. What's panel lining/seam welding/modding/top coating/whatever?
A. I could give explanations for each, but that's what this guide is for! Scroll down to the appropriate sections.
Q. Should I paint/panel line/seam weld/mod/top coat/whatever?
A. If you want. Skip to the conclusion for a more in-depth response.
Q. What tools do I need to buy?
A. A pair of micro flush cutters (aka nippers) and a hobby knife are the basic necessities.
Q. What paints should I get?
A. Model Masters or Citadel are high-quality paints that can be either hand brushed or air brushed. Vallejo is even better, but it's a bit harder to find.
Q. What paint thinner should I use?
A. If you're using a brand name paint, use the corresponding brand name thinner.
Q. *Insert Gundam series* sucks!
A. First off, that's not a question. Second, bitch about it on /m/. /toy/ is for toys, and you shouldn't let the gunpla commerc- er, the shows discourage you from buying designs you like.
Also, http://otakurevolution.com/content/laymans-gunpla-guide has a ton of useful guides. The writer goes by Falldog on /toy/, say thank you if you meet him!
Quick link: http://tinyurl.com/GunplaGuide
- Basic Terminology
- Scales and Series
- Basic Equipment
- Where to Buy
- Where to Start
Basic Terminology
- Gunpla – Gundam Plastic Model | Plamo – Plastic Model
- Runner (Tree) – The sheet of plastic that the pieces are attached to.
- Gate (Sprue) – The bit of plastic that attaches the piece to the runner.
- Nub – The bit of gate left after cutting the part off of the runner.
- Panel Line – The detail lines on the kit, ranging from the two lines on the mouthpiece to crazy things on the legs.
- Decal - Optional decorations that can be applied to a kit to increase detail or just to look good. They come in two forms:
- Dry Transfer – Decals that are applied through rubbing onto a surface. Typically are on a clear sheet with a protective layer of wax paper.
- Water Slides - Decals that must be immersed in water before being applied to a kit. Usually on a light blue sheet and rarely included in Bandai kits. Please note that RG’s come with a sheet that appears to be more blue than green. These are not water slides, they are still stickers. Occasionally referred to as “slide mark” in official JP text, look for the kanji “水” if you have trouble finding them at a store.
- Stickers - Regular stickers with a transparent backing. Placed on light green sheets, and if you buy vKa kits you’ll be seeing a lot of them.
- Foil Stickers - Shiny stickers for the eyes and cameras of most kits. Often on a shiny silver sheet.
- EMS – Stands for Express Mail Service, the most expensive shipping for Asian based stores and always the fastest. Most 1/144 kits will cost around $20 to ship through this method but I’ve yet to wait more than 5 days for a kit. And I’m on the East Coast of the US.
- SAL – Surface Air Lift is the cheaper and slower option. Most 1/144 kits cost about $10 to ship this way but in exchange take around two weeks to ship. Unless otherwise noted, SAL is almost always unregistered if that bothers you.
Basic Equipment
When it comes to tools, you’ve got a choice to make: do you want to buy specialty equipment, or do you want to repurpose something else? Either way can work out, and in all honesty your best bet is to mix and match. Here’s a list of basic necessities for building PlaMo and their alternatives.
First off, you’ll need something to actually cut the plastic off the runners.

Sprue cutters like the pictured Xuron 410 (which is excellent) are the recommended pick, but you can also make do with some miniature wire-cutters (though in this case be careful, wire-cutters don’t cut plastic as much as they stress it until it snaps) or even a toenail clipper if you’re in a pinch. Just don’t use scissors.
Second, something for nub removal. Your two “official” choices are either sandpaper (you’ll need a medium grit and a fine grit, try starting with 400 and 1000) or a hobby knife. Speaking of hobby knives, I highly, highly encourage you to bite the bullet and get X-Acto or Olfa (preferably Olfa). Both are going to be significantly sharper than the no name set you may find at a hobby shop or big box store.. Meanwhile your “unofficial” choices are either a nail file or (if you’re desperate) once again a toenail clipper.
- I highly recommend simply purchasing an Olfa Cushion Art Knife (157B) set, they range from $10-$13 depending on the phase of the moon.
- There are a lot of starter sandpaper packs on the market, so just look around Amazon or something. Buy some popsicle sticks and combine them with the sandpaper to make your own sanding sticks. Or just skip all that and buy some pre-made sanding sticks, whatever works.
Third, panel lining tools. Assuming you want to keep things paint-free, gray and black fine-point markers will be your weapons of choice. Good choices are Sakura Micron 005, fine point Gundam Markers, and super fine-tipped Copic Markers. And for you wannabe MacGuyvers, a mechanical pencil will also work! Look for 0.3 mm lead.
Alternative Options
These are pricier options than what are recommended above.
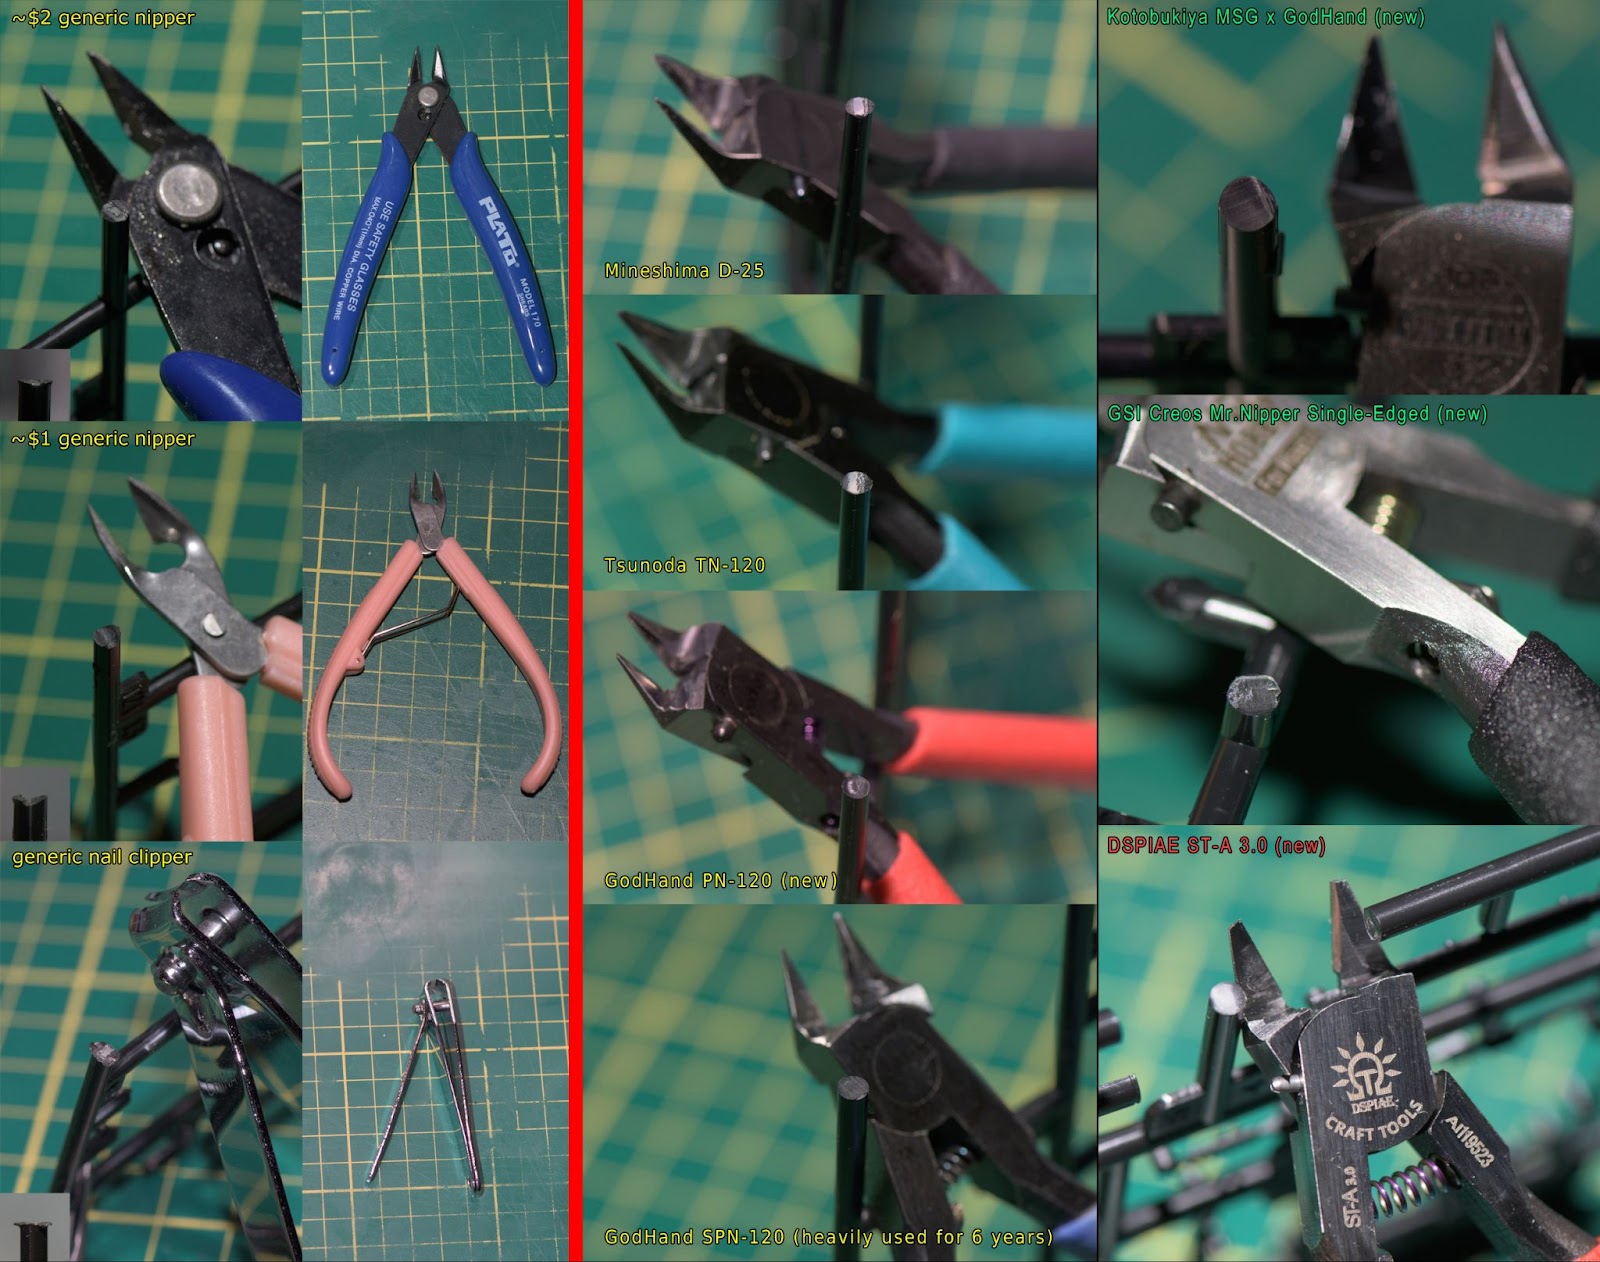
- Ultimate Nipper (God Hands) or Gundam Planet Nippers
The Ultimate Nippers are what I’ve started using, they’re very sharp, and allow you to get very close to the piece while removing the part from the runner. The Gundam Planet nippers are a similar style, but for much less (on average).
***Note***
The Ultimate Nippers are kind of overpriced, and while I don’t regret spending $50 on mine, there are alternatives that are the same style for much less. - Mineshima D-25
Similar to the God Hand nippers, should retail around $20 USD or 2000 Yen. - Below is a chart showing a comparison of different nippers (click here for a larger version).
Where to Buy
So you’ve got your tools, made sense of my guide and decided on what you want. Good, now here are a few plastic crack suppliers. Remember to shop around, aka check a bunch of different retailers on their prices, including shipping. Even if you only save a few dollars, that can be the difference between being able to buy a Big Mac or not.
Your Local Hobby Shop
Not all towns have one, but if yours does there’s no reason not to check it out. They might not sell Gunpla, but they’ll probably at least sell the tools.
Your Local Art Supplies Shop
Most towns at least have this, and they’re a great source for paints and tools.
After a bit of a kerfuffle with Bandai, AmiAmi no longer sells gunpla outside Japan. Still good for other stuff though.
For those of you who visit us on /toy/, you may occasionally hear eBay as a suggested place to buy your plastic/resin crack. I’m sure you have your reservations, but it’s a good site to check if you are looking to buy one or two kits (especially if the person will combine shipping). Just make sure you know where your package is coming from and be sure to check the seller’s rating.
Surprisingly, Amazon isn’t a bad place to look for gunpla either! However, you need to make sure you are buying from Amazon directly, not a store using Amazon. If you are buying it from Amazon, your shipping will be fairly cheap, and if you have Amazon Prime you can get free 2-day shipping. Just don’t expect cheap baseline prices.
Despite the name, they sell a ton of Japanese toys. Their prices are pretty in line with Japan based companies. Shipping is either via USPS (pay by weight) or FedEx (pay by order value). Flat $9.99 for Fedex on orders less than $100, maximum of $18.95 charge for orders in excess of $300. Only thing to watch out for is that they will let you order backordered items currently, and they’ll hold your whole shipment until the backordered item is in (generally two weeks). They’ve got a pretty rad website design and open up their location on Fridays, Saturdays and restock days. Last time I went they had a few kits at reduced prices that they didn't put on the site because they came with damaged boxes from their shipment.
Similar to AmiAmi, HobbySearch no longer sells gunpla outside Japan.
HobbyLink Japan is a great store for buying kits, figs and the like. Their best feature is known as the Private Warehouse. Simply put you can order a bunch of stuff and have it stored for you and then choose to ship it out in mass at a later date vastly reducing shipping costs. Their prices are generally great for models and average for other things. Combined with the shipping they can often be your best option for buying, especially if you are doing it in bulk.
While nothing special, they do carry a wide range of products for a good price. They will run some nice specials from time to time. Be warned, they are a Japanese retailer so it’s entirely possible that your shipping may be pushed to EMS.
A Japanese based site that sells many different items including gunpla. It’s good for some kits you can't find anywhere else, and not so good for regular kits you can find on AmiAmi discounted. Doesn't have a shipping calculator so make it 1000 yen for SAL ($12) and 1750 for EMS ($22) on a single HGUC package. It has a 500 yen ($6) handling fee if your order is under 5000 yen (~$60), so when estimating the shipping factor those 500 yen if you're ordering less than 5000 yen worth of stuff. (Thank you kind anon)
- For best results、 when searching use Japanese strings. Common phrases: ガンダム mg (Gundam mg), ガンダム hg (Gundam hg), ガンプラ (gunpla), プラモ (plamo), ROBOT魂 (Robot Damashii), Muv Luv: マブラヴ, Kotobukiya: コトブキヤ, Zoids: ゾイド (or HMM). If you need anything else, just google for it or ask in the thread
A bit of a new player, but I (GG) have bought quite a bit from them, both kit and supply wise. They carry the standard array of kits with cheap shipping, but the supply selection is a cut above. They carry AK Interactive acrylic paints, along with the regular Tamiya, Mr. Hobby, and Gaia Notes.
The name is a lie. Almost everything is on sale, but their base prices are higher than other sites so everything’s actually more expensive. This makes them pricey for small order, but they’re decent to good for bulk orders. Why? 1) Free shipping within the US on orders over $100. 2)The coupon code BUY100 takes $20 any order over $100.
Another California-based online retailer. They have a wide range of items for good prices, and if you happen to live in the Bay Area they’ll waive shipping costs and let you go to their warehouse to pick up your order.
Riktasi says this is a decent US based store with good prices and a couple exclusives. You’ve probably run into them if you buy on eBay or Amazon since they’re pretty reliable sellers. Unfortunately their website design blows so just look for them on those two sites.
Zombster, for the Australians
I was told of this retailer during one of the Gunpla General threads. I don’t know much about them but the anon said it was his primary retailer.
P-Bandai is Bandai’s premium hobby shop.
Not just for decals anymore! In addition to P-Bandai he also takes pre-orders for Dragon Momoko products. I’ve used him twice for kits, once for MG Tallgeese III and again for my DM MG Akatsuki. Both times shipping was perfectly reasonable for RSAL ($20-25) and there where no other issues. Ordering from him is a little weird, you have to email him what you want and then he sends you a payment request.
USA Gundam Store
Not just for P-Bandai (which they’re pretty good for). Good selection and pricing, and shipping is $10 under 6lbs. From what I can find they used to be a big eBay shop then got their own site.
PS:
Gunpla friends not from the US, I feel I have a duty to inform you of something. Unless you live in Canada or Mexico, do not order from a US based retailer. The shipping costs will be astronomical, if they’ll ship internationally at all (those of you in US territories, I have no idea). Please make a note of this when you are searching for models. As such, check your country’s version of Amazon first, then go look at Asian based retailers.
For Filipinos, a member of our Discord channel has kindly given me a write up
Where to start
First off, let’s establish that Bandai is not the only model kit company in town. There are lots of alternatives, like Kotobukiya or Tomy. What Bandai is, though, is the best manufacturer. They’ve funneled a lot of their money into R&D, and as a result have superior plastic quality, model kit engineering, and even cheaper price points (all things considered). Pretty much the only reason you should buy from a different company is to get the kits Bandai doesn’t make, like Super Robot Wars OG or Zoids.
Now let’s talk about Gunpla.
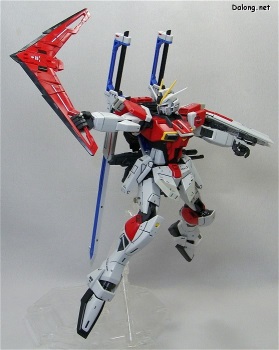
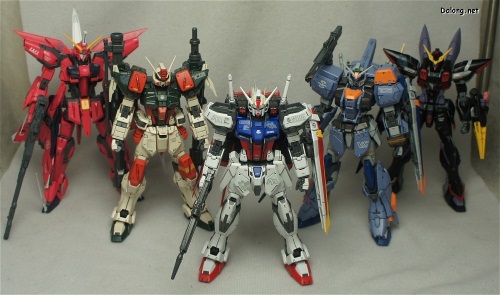
First, go to dalong.net. It’s a Korean site that has detailed pictures of almost every kit since 1995, and as such a great place to pick something out. Scan through the HG, 00, and AGE sections and choose whatever appeals to you most.
Still undecided/too lazy? Well fine, let me help.
High Grade
Pretty much the best HG to start with is...well there’s quite a few these days. Pretty much anything from the HGUC Revive line is going to be great. I’m going to level with you however, it’s become very, very difficult to recommend one kit in particular as stock levels fluctuate wildly now (circa May 2022). In general, any kit in the $10-$20 range is an excellent starting place, and these days there are very few bad HGs being released.
Master Grade
So you've had your fun with the little guys and you want to move up to the big leagues. But while you’ve decided you want to build a MG, you don’t know much and they just look so big and scary. Well have no fear, I've got the perfect kits in mind.
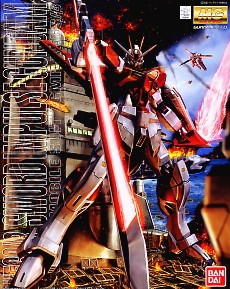
First up are the Impulses. And by that I mean Force and Sword because Bandai hates Blast Impulse with a passion. Even if they aren't your favorite suits, Sword and Force Impulse are still pretty cool, and fairly simple builds as far as MGs are concerned.
Oh and this should be obvious but just in case, don’t get both. Just get the one you like more.
What? Do you want me to recommend one?
Well the Sword Impulse has a boomerang...
If you’re some kind of crazy boomerang hater, try one of the Seed vRM kits. They’re pretty cheap as far as MGs go, are recent so they’ve got some great engineering, and cover a wide range of interests.

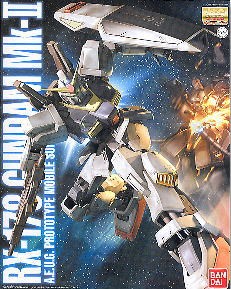
And if you’re a UC supremacist (which I’m going to tell you right now is a fucking silly mindset), you can't go wrong with the 2.0’s of the RX-78-2 or the RX-178 Gundam Mk II.
Some people hate the RX-78-2 2.0 because of how cartoony it looks.

Well the 2.0 doesn’t give a shit, talk to the feet. The feet are apparently Korean.
Also, keep in mind, much like the stock issues with HG kits, MGs have the same problem. However in general, there’s very little in the way of “bad” MGs. The older (late 90s - early 2000s) kits are not as nice to build as the newer ones, but you are likely to find them on the cheaper side.
- Understanding the Manual
- Cutting
- Detailing
Understanding the Manual
The second you crack open the manual, the first thing you’re going to notice is that it’s in Japanese. I think it’s safe to assume that the vast majority of the people reading this guide can’t parse moon, so let me reassure you: you don’t need to know Japanese to read PlaMo manuals.
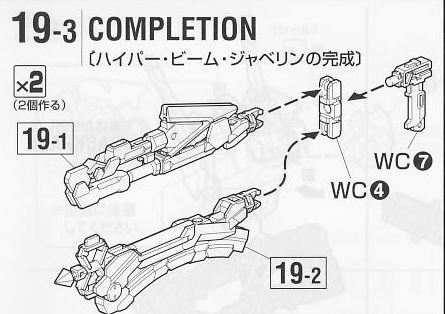
Here’s an excerpt from the MG FA Unicorn’s manual. While there’s some Japanese on it, notice how all of the pieces are labeled with stuff you can understand. For example, this particular bit says we need
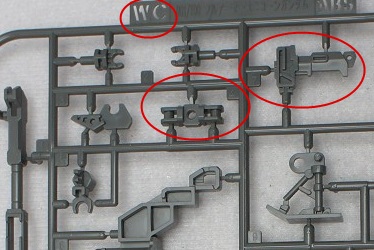
pieces 4 and 7 from the WC runner,


as well as the final results of steps 19-1 and 19-2.

Really, the only things that might confuse you are these symbols. Most of them are easy enough to figure out, but just in case, here's a translation. From left to right, and starting with the top row:
- This part must be glued. (You will never see this in modern Bandai kits.)
- Apply foil sticker here.
- Apply decal here.
- Place parts on the opposite side. You’ll find this next to two part numbers.
- A similar part will be placed on the opposite side. This shows up next to only one part number, think of it as a heads up for what you’ll be doing later.
- Be very careful with the part’s orientation during assembly.
- Don’t tighten the screw too much. (Most modern kits don’t have screws.)
- This part has excess plastic that needs to be cut.
- Do this step multiple times.
- Connect this part first.
- Connect this part last.
- Rotate this part the given number of degrees.
- You can choose which way you want to build your kit here. For instance, do you want your model to hold its shield or not?
- The piece on the opposite side will move the same direction.
Got all of that? Okay, just one last piece of advice before moving on: READ THE FUCKING MANUAL. THEN READ IT AGAIN!
Cutting
Basic Tips
So you’ve got your kit and tools and you know you need to put the thing together. Your first step is to make a workspace somewhere, as big as you can manage, and as far away from cats, dogs, small children, and anyone/thing you feel could mess with your pieces.
Okay you’re done? Well let me just take a look an-
NOPE NOPE NOPE
The above isn’t a workspace, it’s just a pile of stuff. And while in the end it’s up to you to determine how you want to sort things,
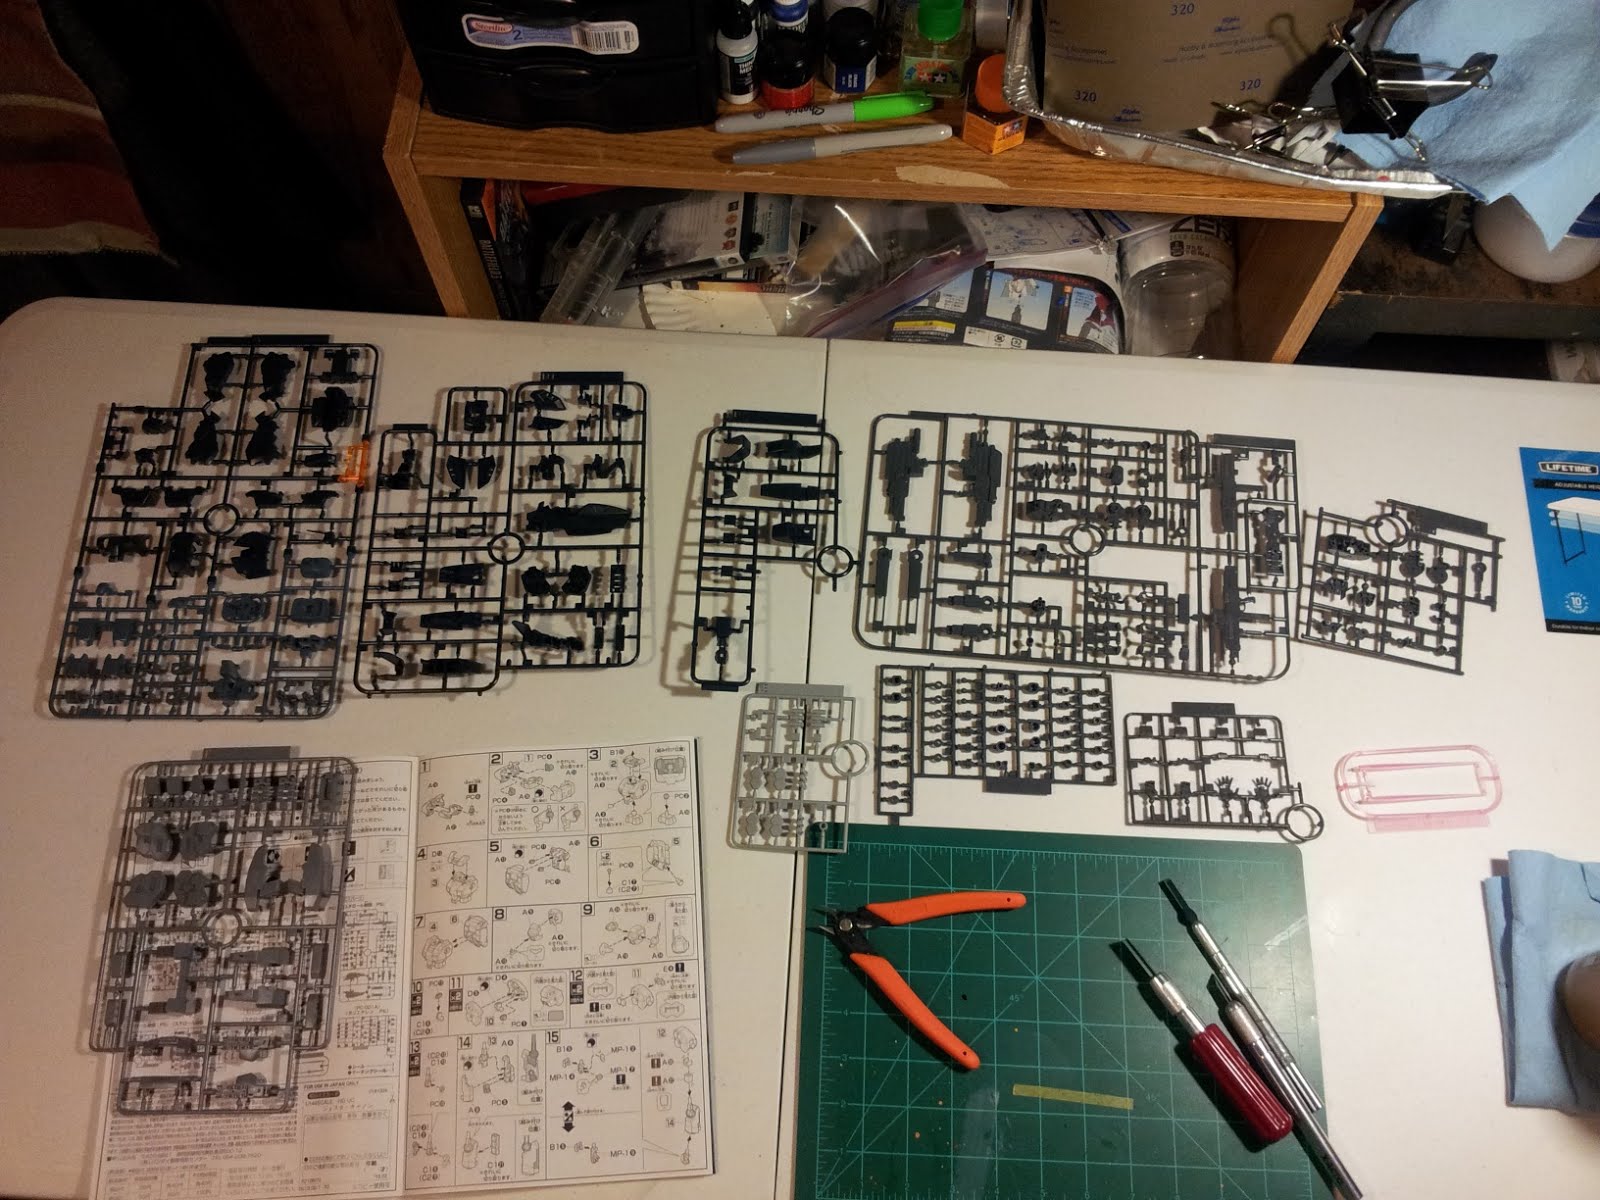
Wouldn’t you agree this looks much better? Admittedly most of us don’t have such a wealth of free space, but just doing your best to imitate what you see here (open instruction manual in clear sight, necessary runners laid out individually, tools not haphazardly strewn around) can go a long way.
Removal
Removing pieces from the runner is pretty straightforward. First we have an image explanation, second, here’s a video for it: https://youtu.be/FXHVgH6mC6c.
When you look at the runner, take a look at where the runner is attached to the piece you’re removing. This is the gate. As you can see from the marked red lines, I’m going to cut close to the thicker part of the gate (leaving the majority of the thin portion attached to the part), so that we leave a nub.
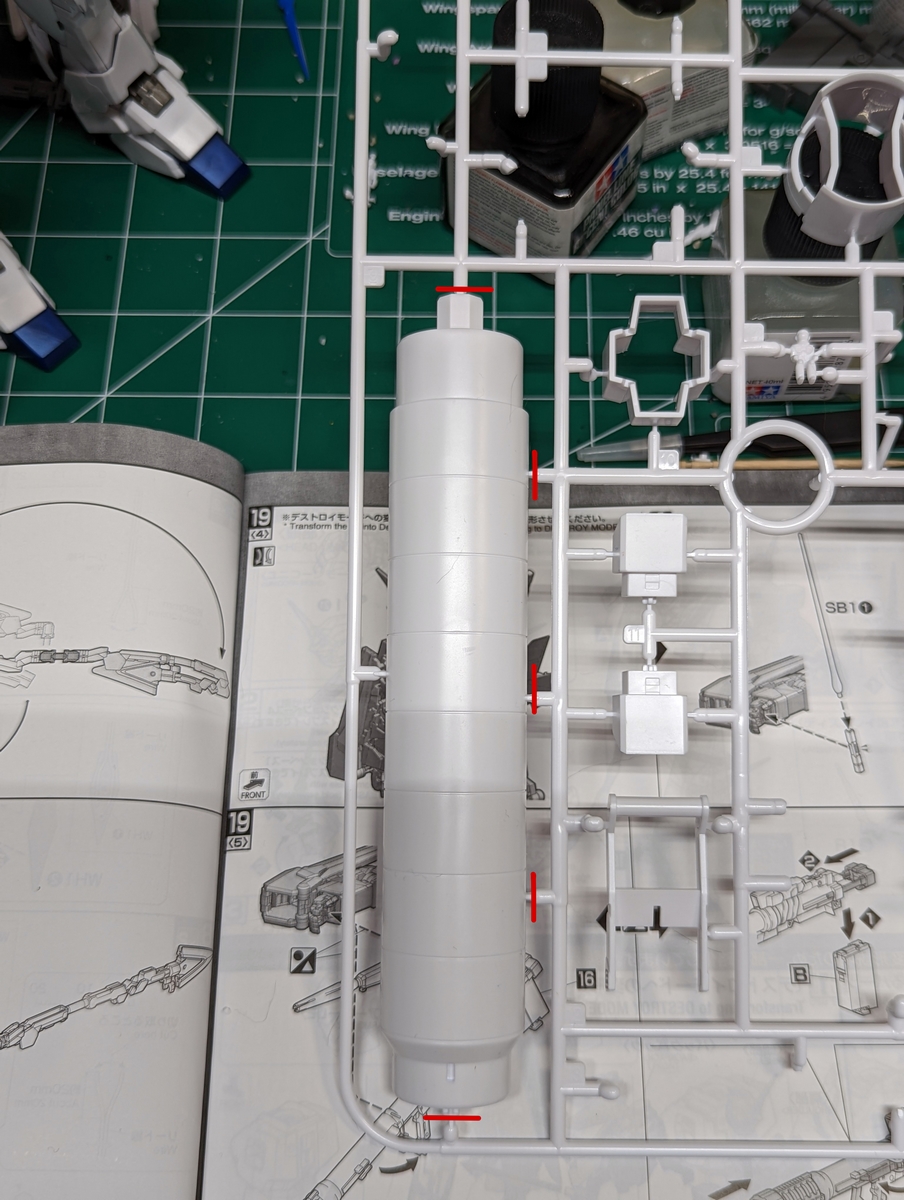
Now that we have the part removed from the runner, we’re going to make a second set of cuts, leaving just a millimeter or so remaining.
As you can see, now that we’ve made two sets of cuts, there’s a lot less nub for you to deal with.

Trimming
As soon as you cut a piece off the runner with whatever tool you’re using, you’ll run into nubs. What happens next depends on your denubbing tool of choice.
If you have an X-Acto knife, lay the flat part of the blade (the bottom is completely flat, the top, where it has an incline is the blade. Yes, I’ve had to explain this before) on the piece, right in front of the nub. Now simply go forward and the nub will come off, you may have to wiggle or get a pair of side cutters or toenail clippers if a piece is really thick, but nine times out of ten this works best.
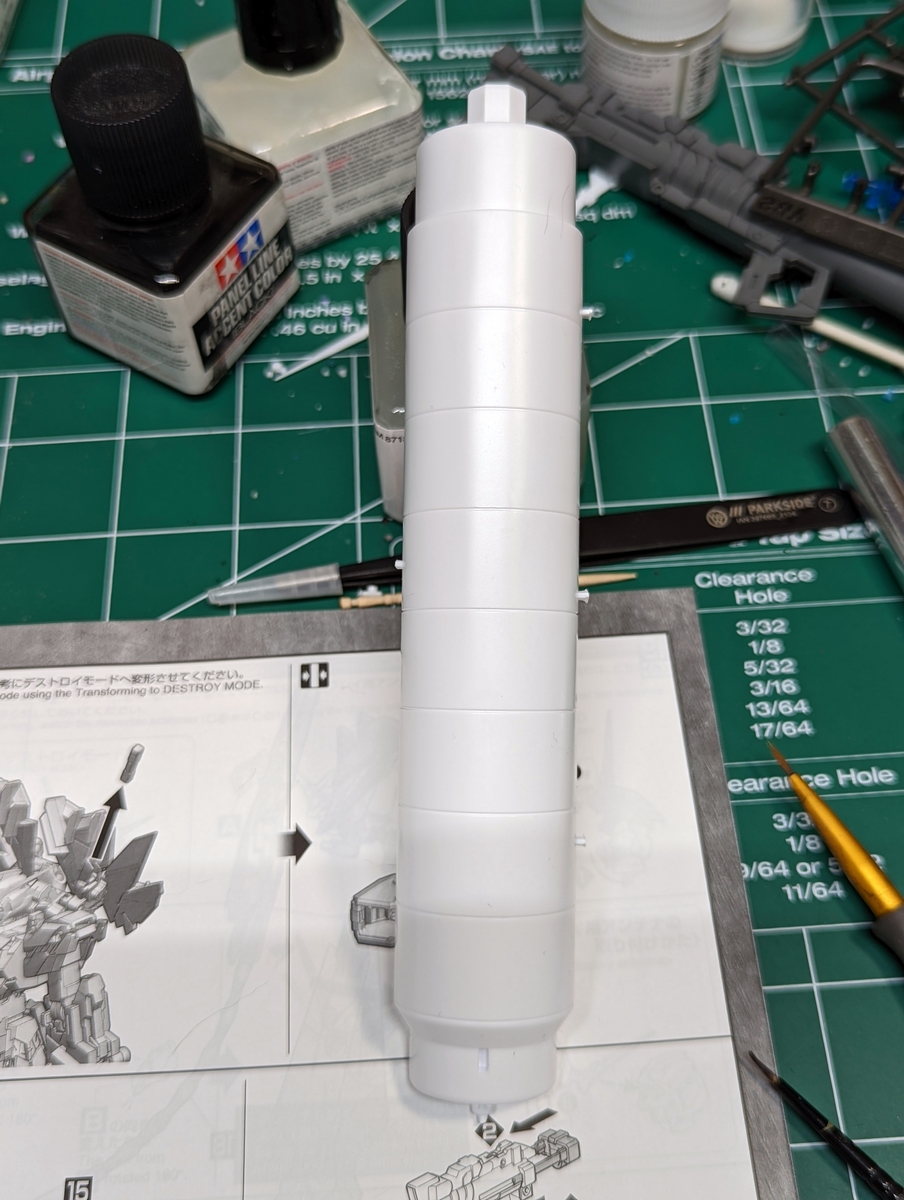
Video guide: http://youtu.be/bPs9zhQ7OAY, a second, new video https://youtu.be/wpbPoYNAcSA. In the second video guide you will see me completely removing the nub on the peg at the bottom of the fuel tank, rather than leaving a smaller nub. This is because there’s no need to worry how clean this nub is, as it’s simply going to be in a hole and covered.
If you have sandpaper, just rub the nub down with your medium grit and then use your fine grit to smooth out the result. For best results use a variety of grits and work your way up from lowest to highest. And to avoid spreading plastic dust everywhere, wet your sandpaper before use.
If you did things right, you’ll have a slightly discolored bit of plastic where the nub is. You can try scratching it with your fingernail, but if you want to make it go away entirely you’ll need paint.
Also: if you ever find yourself having to pack up and continue some other day, try not to just leave your pieces sitting around. Put them in a jar, or a thick plastic box, or something to keep them from getting lost.
Detailing
So you followed the instructions to the letter and now you have a finished kit. Problem is, you also have a bunch of decals on a sticker sheet and don’t know what to do with them. Honestly you probably should have put those stickers on while you were building, but hey no biggie. Just treat them like regular stickers and place them where the instruction booklet says to (which sticker you should use is usually indicated with a japanese character, if you’re not good with those just put the sticker sheet next to the picture and match). Pulling them off can be a hassle, but hey you have the shiny X-Acto knife, put it to use. If you have to you can also cut the decal out from the sheet and pull it off. This is also a good technique if there are excessive amounts of nothing (clear areas) on a decal and you are having trouble placing it.
Now dry apply/waterslide, those are a different story.
With dry apply, you’ll have a transparent sheet over some wax paper. It is absolutely crucial to remember which side of the sheet was facing the wax paper, as that is the side that should come in contact with the model. Cut out the decal of your choice and tape it to the surface of the plastic. Then rub on it with something (a stylus or some other blunt tool is ideal, but your fingernail works too) until you think it’s been fully applied. Then slowly strip off the tape; if at any point you see that some of the decal didn’t stick, gently put the tape back where it was and get back to rubbing. If you would like a more detailed guide, with pictures, follow this link.
It is crucial to remember which side of the sheet is the back, since if you screw up, you’re going to end up with the decal permanently stuck to the tape. Also use small strips of tape, or you could end up covering (and ripping off) an already placed decal.
With waterslides, you’ll have a blue sheet of paper. This thing is actually a sandwich of sorts; there’s the blue, water-resistant paper, the actual decal, and a thin film on top that dissolves in water. Cut out the decal of your choice then dunk it in water for about twenty seconds or so. Then slide the decal off (this is probably the hardest part of the process, so don’t feel too bad if you make a mistake) the paper and place it on the model. It’s recommended you wet the surface of the plastic too so you can have some leeway with positioning the decal. Leave the decal to dry for a bit (a process you can speed up with Mark Setter, if you have any), and voila.
Waterslides can be reactivated if you drop some more water over them, and if they break up you can kind of reassemble them on the model kit. They also tend to look a lot nicer than dry apply, so due to all of these reasons they’re the favored decal choice. Too bad they’re usually sold separately. Anyways, I recommend putting them on first since putting water on dry apply/stickers is a recipe for disaster.
Next up, panel lining. I hope you at least bought black and gray or whatever pen you chose. The methodology here is super simple: fill in lines. However, don’t go insane and make the lines super thick (well you can, but...), they end up looking terrible, and you’ll probably end up hating them as well. Try to get them as thin as you can, use a cotton swab, a piece of tissue, your finger, whatever you can to rub off the excess. Clean, thin lines look far better than the crazy thick monstrosities dalong uses. Speaking of him, using his pictures isn’t a bad way to see how the lines should be done, however like I said try not to make them quite so thick. (Video guide: http://youtu.be/js5EFWqX5S8)
If you’re adventurous and believe you will be building models for a long time to come, I highly recommend investing in Tamiya Panel Line Accent or Mr Hobby Mr Weathering Color. Shake before use (vigorously), and apply with the included brush or your own super fine brush. Through capillary action it’ll spread through your lines. Wait at least 10-15 minutes (or longer) and clean these up either with lighter fluid (such as Ronsonol or Zippo) or using Tamiya’s X-20 ENAMEL thinner (there's two types of C-20). Get some on a q-tip and lightly rub the excess off of the line, this may take some practice.
As for which color to use (or which tool). I generally prefer to use pencil lead or a gray marker on lightly colored kits, white, light blues, and the like. For darker colors I tend to use black, or in rare circumstances, gray, but never pencil lead (you can’t usually see it). However, much like everything involving models, it’s your damn kit and you can damn well do what you please, don’t listen to me, listen to yourself, if you think black looks better, then do it.
EDITOR’S NOTE: Personally I like to use a darker shade of whatever color surrounds the panel line; dark red on bright red, gray on white, etc. And for really dark colors, silver panel lines look spiffy.
Panel Washes
The Super Pro way to panel line, and definitely something you should learn. Go here. Or, if you don’t want to mess with enamels, head over to the next section of the guide.
Conclusion
That model is yours. If you don’t like the way I do something in this guide, then do it the way you want to. If you feel like painting something bright pink and covering it with purple dots, go right ahead. Hell you might even make it look cool, don’t let the internet put you off. Just don’t write off criticism as someone being an ass, sometimes people are honestly trying to help you improve. Though there are some elitists, it’s 4chan.
Now to all of you novices, remember something: you don’t have to sand your kit, paint it, panel lines, or top coat it. Everything beyond actually assembling the kit is completely optional. But damn if a kit doesn’t look better after some or all of that. In the interest of showing you what you should shoot for, I’m going to show you a few of my kits, and explain what I did to them.
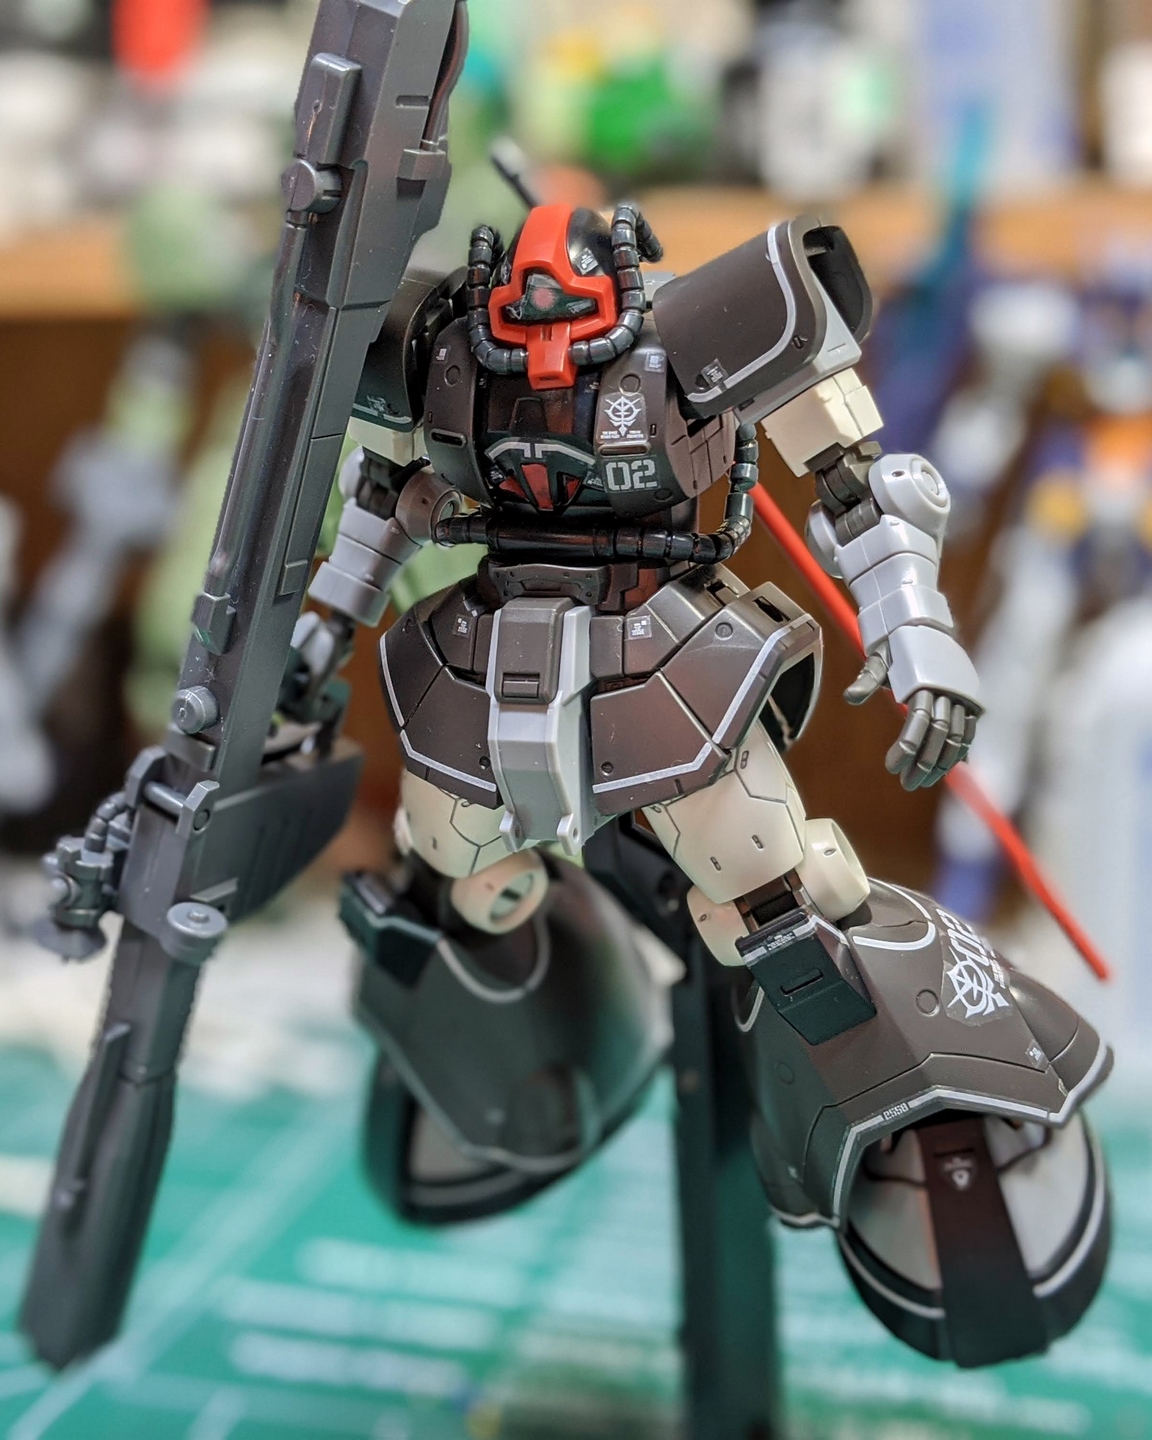
This is my HG Origin Prototype Dom. Here, I only did the sticker decals, and panel lining.
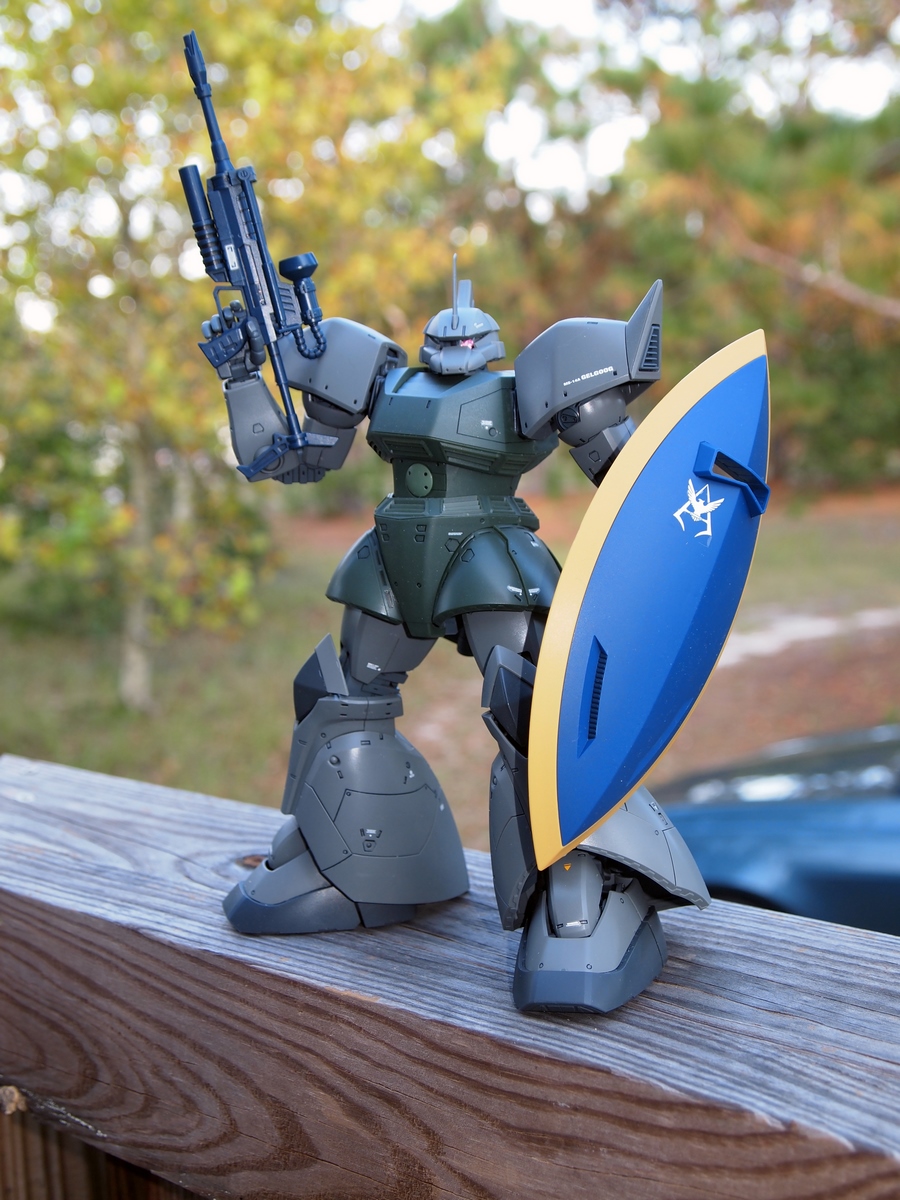
This is my MG Gelgoog 2.0. The kit is unpainted, but has been panel lined, waterslides placed, and then top coated (using Alclad II Klear Kote).
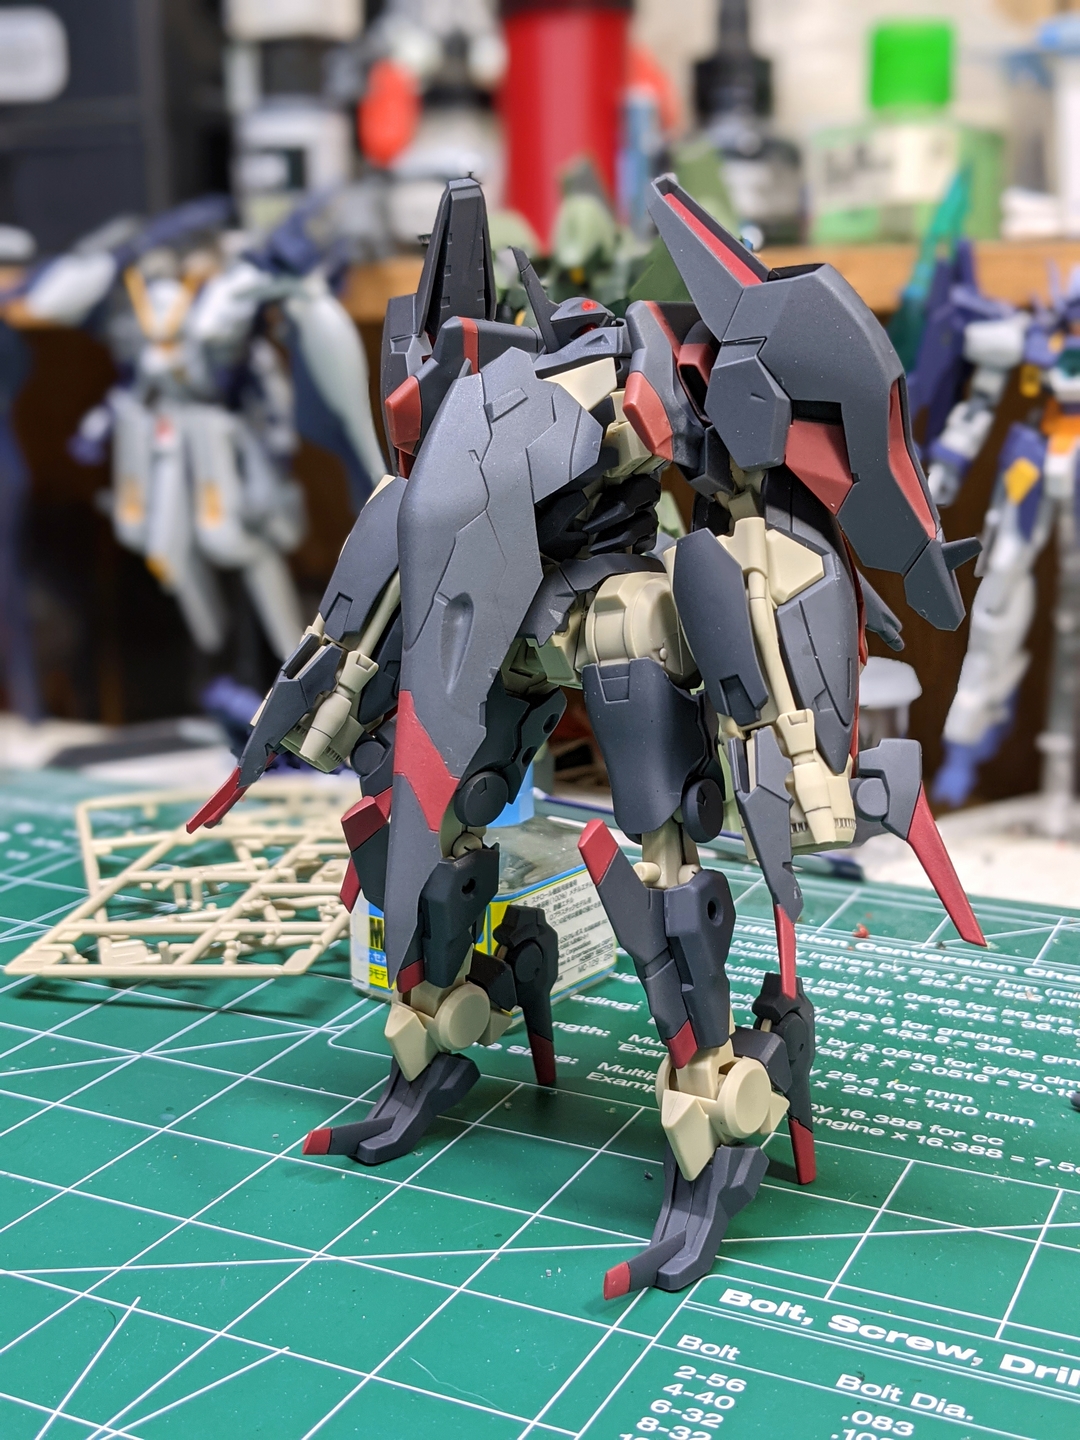
Lastly, here’s a more recent example of a mixture of painting and topcoating. This is the Frame Arms Lei-Dao, from Kotobukiya. As an aside, the Frame Arms line typically needs some paint to be color accurate. And that’s what I did here. I painted all of the red (using AK Brick Red) via hand painting. Then I topcoated it with Mr Super Clear UV Flat finish.
The vast majority of my kits are like the Prototype Dom. I have neither the time, nor inclination to paint and top coat every kit I build. While I will randomly pick kits to do heavy work on, remember, everyone is different. Plenty of people do straight builds (AKA out of box builds). Do what you want, the kit is yours and we can’t reach through the internet and make you do something different.
Just one final piece of advice: be careful. Just like following the instructions it sounds so simple, but if you’ve read this entire guide you’re likely starting to grasp that a lot goes on in building a kit. I’ve messed up several models with very basic errors that could have been avoided if I’d simply paid more attention to the instructions, the model itself, or even stuff in this guide.
On that note, I bid you good day. Happy building!
Contact
Email: gelgoogguygppg@gmail.com
Discord: Gelgoog Guy#1789/https://discord.gg/SpSw2QbycH
Steam: Gelgoog Guy
Acknowledgements
Thanks to:
- Chris for the airbrush guide.
- Sgt Sagara for acrylic thinner and seam welding guides.
- Eden for the Resin guide.
- Kendall for the painting guide.
- Falldog for the top coat guide.
- AGerbil for some helpful notes.
- Bacon for the Philippines buying guide.